Sony VAIO laptop: How to Remove the Hard Drive
Before you start:- Turn off your computer. Remove the battery
- Locate the hard disk bay on your computer
- Remove screws securing the hard drive cover and remove the hard drive
If you want remove the Sony VAIO hard drive, we recommend that you allow a qualified service person to do it. If you decide to remove the drive yourself, follow these instructions carefully.
1. Have your Sony VAIO turned off, all cables disconnected from it, and the battery removed. On the flat stable surface turn over laptop - so that the bottom of it is up, facing you.
Using a small screwdriver, remove all screws which you find on the bottom.
We advise you to mark all case screws, some are longer than others.
2. Remove the keyboard/cover
Turn your Sony VAIO back over onto its bottom, open the screen, and remove the keyboard.
Under the keyboard you will find few more screws. Unscrew those, at this time you may lift the upper part of computer frame up.
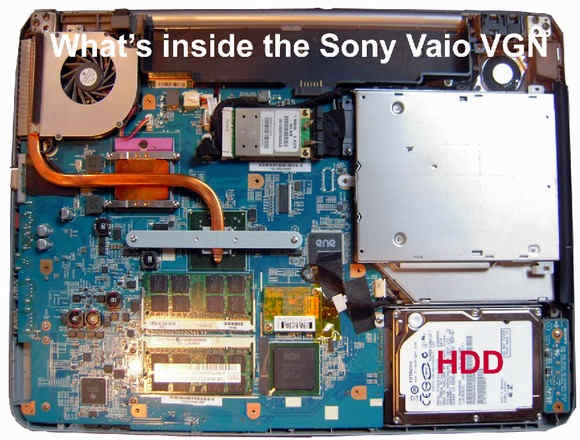
Now, you have an access to the hard drive to be removed.
Do not forget to remove the tray and a connector bar from the hard drive, if those are used on your model.
Keep them for the new drive installation.
Sony HDD Location example: What's inside the Vaio VGN

After you are done with the hard drive removal you may proceed to placing the data recovery order.
